Hands-on Git Tasks - Part #4 of 5 | Using Remote Repository
This post is part of a 5-post series on using Git.
Hands-on Git Tasks - Part #1 of 5 | First Git Commit
Hands-on Git Taks - Part #2 of 5 | Checking Git Objects
Hands-on Git Tasks - Part #3 of 5 | Navigating Project Branches
Hands-on Git Tasks - Part #4 of 5 | Using Remote Repository
Hands-On Git Tasks - Part #5 of 5 | Merging
Follow these steps for an example of how to work with a remote repository using your AWS Cloud9 Environment. (For steps to create your Cloud9 Environment, go here: https://medium.com/@lewislampkin/creating-an-integrated-developer-environment-ide-in-the-cloud-in-two-minutes-c96e33b2fa3e) (This example assumes you have a Github account. If not, create one here: https://github.com/signup?) (This example assumes you setup a personal access token for GitHub [in lieu of password]. If not, create one here: https://docs.github.com/en/enterprise-server@3.8/authentication/keeping-your-account-and-data-secure/managing-your-personal-access-tokens)
01. On GitHub, Create a new repository
02. On GitHub, Set name and visibility, click create repository
name: simple-website-repo-poc-1
visibility: private
03. In AWS Cloud9, create another local repo folder: local-repo2
cd ~/environment
mkdir local-repo2
04. In AWS Cloud9, move to the new local repo folder
cd local-repo2
pwd
05. In AWS Cloud9, paste the commands from Github for "create a new repository on the command line"
echo "# simple-website-repo-poc-1" >> README.md
git init
git add README.md
git commit -m "first commit"
git branch -M main
git remote add origin https://github.com/lewislampkin/simple-website-repo-poc-1.git
06. In AWSCloud9, use this variant of the git push command
git push --set-upstream origin main
(Note: you need to use your personal access token (PAT) at this step, not password. If you need to create a personal access token, go here: https://docs.github.com/en/enterprise-server@3.8/authentication/keeping-your-account-and-data-secure/managing-your-personal-access-tokens ... make sure to give your PAT permission to the repository.)
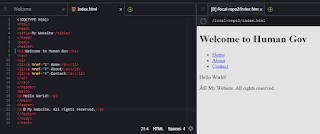
07. In AWS Cloud9, Create a file 'index.html', save it and preview it
```
My Website
Welcome to My Website
Hello World!
```
08. In AWS Cloud9, check the git status
09. In AWS Cloud9, git add index.html, and re-check status
10. In AWS Cloud9, Commit the changes
git config --list
git commit -m "AWS Cloud9 1st Commit index.html"
11. In AWS Cloud9, Send changes to remote repository
git push -u origin main
[You should be familiar with the credential process now.]
12. On GitHub, validate that you see the index.html added to your remote repository
13. In AWS Cloud9, update the index.html, "Welcome to HumanGov"
14. In AWS Cloud9, check git status
15. In AWS Cloud9, add the index.html to staging
16. In AWS Cloud9, commit the change
git commit -m "AWS Cloud9 modified index.html - Welcome to HumanGov"
17. Check GitHub, validate that you still have the prior version of index.html
18. In AWS Cloud9, send changes to remote repository
git push -u origin main
19. On GitHub, validate that the index.html has been updated.
20. On GitHub, check your commit history
21. In AWS Cloud9, check your git log
Note: The commit history on GitHub should match your git log from AWS Cloud9
If you want to find me, you can catch me, Lewis Lampkin, III at LinkedIn: https://www.linkedin.com/in/lewislampkin
If you want to read my blog: https://www.lewislampkin.com


Comments
Post a Comment